
Unleash Your Inner Baker: A Guide to Artisan, No Knead Bread
- The Sisters

- Aug 26, 2020
- 7 min read
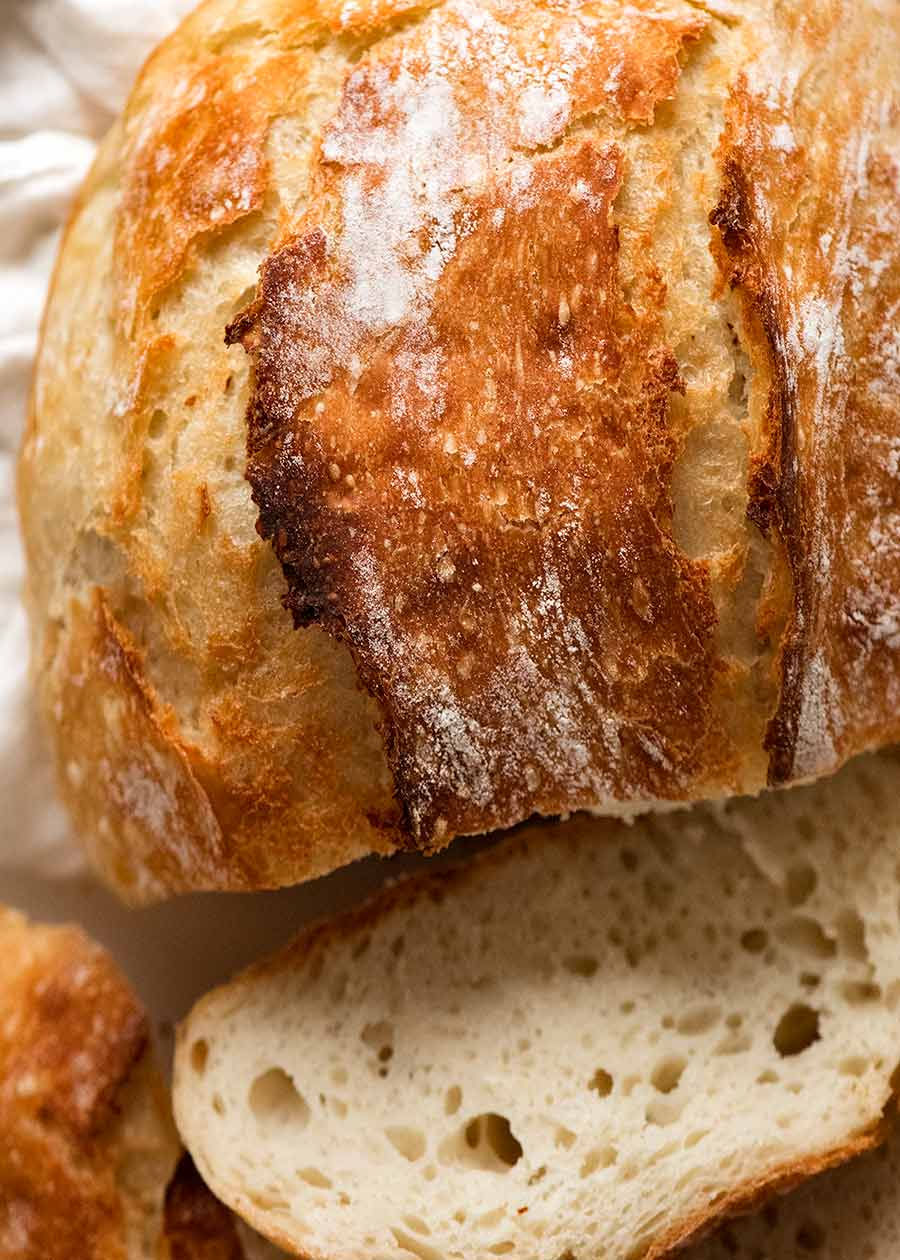
I absolutely adore this bread recipe. It stands out as the best and easiest yeast bread you will ever come across, making it a true gem in the world of baking. For those who are just starting their culinary journey, this recipe offers a straightforward approach that is easy to follow, ensuring that even novice bakers will feel confident and accomplished in their efforts. At the same time, seasoned bread connoisseurs will find themselves captivated by the remarkable Artisan bread qualities that this recipe embodies. The final product boasts a thick, crispy crust that provides a delightful crunch with each bite, while the interior features a chewy crumb that is both satisfying and comforting. The bread is also characterized by its big, fat holes reminiscent of traditional sourdough, which not only adds to its aesthetic appeal but also enhances its texture and flavor profile.


There’s nothing quite like enjoying this bread fresh out of the oven, when it’s still warm and fragrant, slathered generously with creamy butter that melts into the nooks and crannies, creating a heavenly combination of flavors and textures. This bread is incredibly versatile and can be used in a multitude of ways.
You can craft delicious sandwiches, using it as the perfect base for a variety of fillings, from classic deli meats to fresh veggies and spreads. Toasting it elevates its flavor even further, making for a delightful breakfast or snack option. It’s also perfect for mopping plates clean, soaking up the last remnants of a delicious meal, and it serves as an excellent companion for dunking into rich, hearty soups and comforting stews. The possibilities are endless; you can transform this bread into delightful bruschetta, topped with fresh tomatoes and basil, or create mouthwatering garlic bread that complements any Italian dish. Additionally, it makes for an unbeatable grilled cheese sandwich, with its crusty exterior providing a perfect contrast to the gooey, melted cheese inside. This bread truly shines in its versatility, making it an essential recipe to have in your baking repertoire.
Here's why it's so simple:
No kneading or stand mixer needed
Only 3 minutes of active work – you won't even get your hands messy
A Dutch oven (cast iron pot) is ideal but not required
The dough is incredibly forgiving, with rising times from 2 hours to 3 days (yes, really, you decide what suits you)
Effortless yet no compromise on bread quality
Ingredients
3 cups (450g) flour , bread or plain/all purpose (Note 1)
2 tsp instant or rapid rise yeast (Note 2 for normal / active dry yeast)
2 tsp salt , cooking / kosher salt (Note 3)
1.5 cups (375 ml) very warm tap water , NOT boiling or super hot (ie up to 55°C/130°F) (Note 4)
Dough Shaping
1.5 tbsp flour , for dusting


Instructions
Mix Dough: In a large bowl, combine flour, yeast, and salt. Add water, then stir with the handle of a wooden spoon until all the flour is mixed in. The dough should be wet and sloppy—not kneadable, but not as runny as cake batter. Adjust with more water or flour for the right consistency (see video at 17 sec, Note 5).
Rise: Cover with cling wrap or a plate and leave on the counter for 2 - 3 hours until it doubles in size, becomes wobbly like jelly, and the top is bubbly (see video at 24 seconds). If it doesn’t rise after 1 hour, move it to a warmer spot (Note 6).
Optional – refrigerate for flavor development (Note 9): At this point, you can either bake immediately (proceed to Step 5) or refrigerate for up to 3 days.
Take chill out of refrigerated dough – if you refrigerated the dough, let the bowl sit on the counter for 45 - 60 minutes while preheating the oven. Cold dough doesn’t rise as well.
Preheat oven (Note 7) - Place a dutch oven with the lid on (26cm/10" or larger) in the oven. Preheat to 230°C/450°F (220° fan) 30 minutes before baking. (Note 8 for no dutch oven)
Shape dough: Sprinkle 1 tbsp flour on the work surface, then scrape the dough out of the bowl. Sprinkle 1/2 tbsp flour on top.
Using a dough scraper or a similar tool (cake server, large knife, spatula), fold the sides inward (about 6 folds) to roughly form a roundish shape. Don’t worry too much about precision—you’re about to reshape it; the goal is to deflate the bubbles and create a shape you can handle.
Transfer to paper: Slide a large piece of parchment/baking paper (not wax paper) next to the dough, then flip the dough upside down onto the paper (seam side down, smooth side up). Slide/push it to the center, then reshape into a round(ish) form. Don’t stress about the shape. In fact, lopsided = more ridges = more crunchy bits!
Dough in pot: Remove the hot dutch oven from the oven. Use the paper to place the dough into the pot, then cover with the lid.
Bake for 30 minutes covered, then 12 minutes uncovered or until it’s deep golden and crispy.
Cool on a rack for 10 minutes before slicing.
Recipe Notes:
MAKE AHEAD/Storage:
Fridge up to 3 days - Rise dough per recipe, then leave in bowl and refrigerate up to 3 days. Flavor gets better with time. Dough will stay bubbly for a day or two, then will deflate – that’s fine. Shape into round and place on paper per recipe, then leave for 45 - 60 minutes to take the chill out of it, then bake per recipe. Cold dough won't rise as well.
Bread in photos & video is 2 hr rise, immediate bake.
Cooked bread - great fresh for 2 days, then after that, better warmed or toasted. Keep in an airtight container or ziplock bag. This stays more fresh than usual homemade bread, especially if you use bread flour.
Freeze cooked bread for up to 3 months.
1. Flour – Using bread flour results in a chewier, fluffier crumb similar to bakery Artisan bread due to its higher protein content, and it keeps the bread fresher longer. Plain/all-purpose flour works perfectly too, though the texture will differ slightly.
Wholemeal/wholewheat flour - Begin with 30g/1/4 cup less flour and add more as needed to achieve the desired consistency shown in the video, as wholemeal flour tends to be more absorbent than white flour.
2. Yeast – Opt for yeast labeled “instant” or “rapid rise.” If only regular yeast (also known as “active dry yeast”) is available, dissolve it in water first (no need to let it foam), then promptly add flour and salt and mix. Continue with the recipe as directed.
3. Salt – Use 1 ¼ tsp if using table salt, as finer grains mean less volume for the same amount of salt.
4. Water temperature – If the water is too hot for a bath, it will kill the yeast. If it’s comfortably warm for a long soak, it’s the perfect temperature.
5. Dough consistency can vary due to factors like different flour brands or humidity. If the dough is too dry, add a little water. If it’s too wet, add a bit of flour. Compare with the video at 17 seconds and the photos above.
6. Dough rising – Rising time depends on room temperature, humidity, and the flour used. Whether it rises quickly or slowly, aim for the dough to double in volume with a bubbly surface and wobbly consistency, as shown in the video at 24 seconds. This recipe is forgiving!
If your kitchen is cool (22°C/70°F or less) or the dough isn’t rising (check after 1 hour), place the bowl somewhere warmer. Yeast thrives in warmth!
If the dough rises faster than 2 hours (e.g., on a very hot day), place the bowl in the fridge to halt the rise while preheating the oven. On hot summer days, it can rise in just 45 minutes!
7. Oven preheating – If baking immediately, start preheating the oven when the dough begins to rise (at 1.5 hours) or if refrigerated, while the dough is resting to warm up.
It’s also fine to shape the dough into a round, place it on parchment paper, and let it sit for 30 minutes while the oven preheats. This is a flexible recipe!
8. Dutch oven (cast iron pot) creates a steaming effect, similar to professional steamer ovens used by bakeries for bread.
Pot size does not matter as long as it’s about 26cm/10" or larger. The pot doesn’t shape the bread; it acts as a steamer. Ensure it’s large enough for the bread to steam.
No dutch oven method – Use a 20cm/8” square metal pan (or similar, but NOT glass, as it may shatter). Place it in the oven on the middle shelf where the bread will bake (or on the shelf below if the tray won’t fit on the same shelf), and preheat the oven. Boil a kettle. Place the shaped dough on a baking tray. When putting the bread in, work quickly as follows: place the bread in the oven, fill the pan with boiling water, shut the oven door to create a makeshift dutch oven steaming effect! Bake for a full 40 minutes until it’s a deep golden brown.
A heavy roasting pan with a high lid should also work – preheat as per the recipe. The bread is about 8-10cm/3.2-4" tall.
9. Fridge = slows down yeast rising, allowing enzymes in the yeast to transform starch into sugar, enhancing the bread’s flavor. See notes in the post for more information.
10. Different measures in different countries – Cup sizes vary slightly between countries. The difference is usually negligible for most recipes, but it matters for baking. For this bread, as long as you use either cups or weights & mls for the flour and water, the recipe will work fine (tested with US and Aus cups, which have the greatest size variance).
Source: This recipe is from Recipe Tin Eats, adapted from The New York Times. The New York Times recipe has been halved to make one batch. Nagi has added the above helpful tips and tricks after extensive trial and error over the years.
Nutrition per slice
Nutrition INFORMATION:
Calories: 155kcal (8%)Carbohydrates: 32g (11%)Protein: 5g (10%)Fat: 1g (2%)Saturated Fat: 1g (6%)Sodium: 469mg (20%)Potassium: 65mg (2%)Fiber: 2g (8%)Sugar: 1g (1%)Calcium: 7mg (1%)Iron: 2mg (11%)
Enjoy!


Comments