
Breaking Bread: Uncovering the Secrets of Japanese Milk Bread
- The Sisters

- Jan 21, 2021
- 5 min read
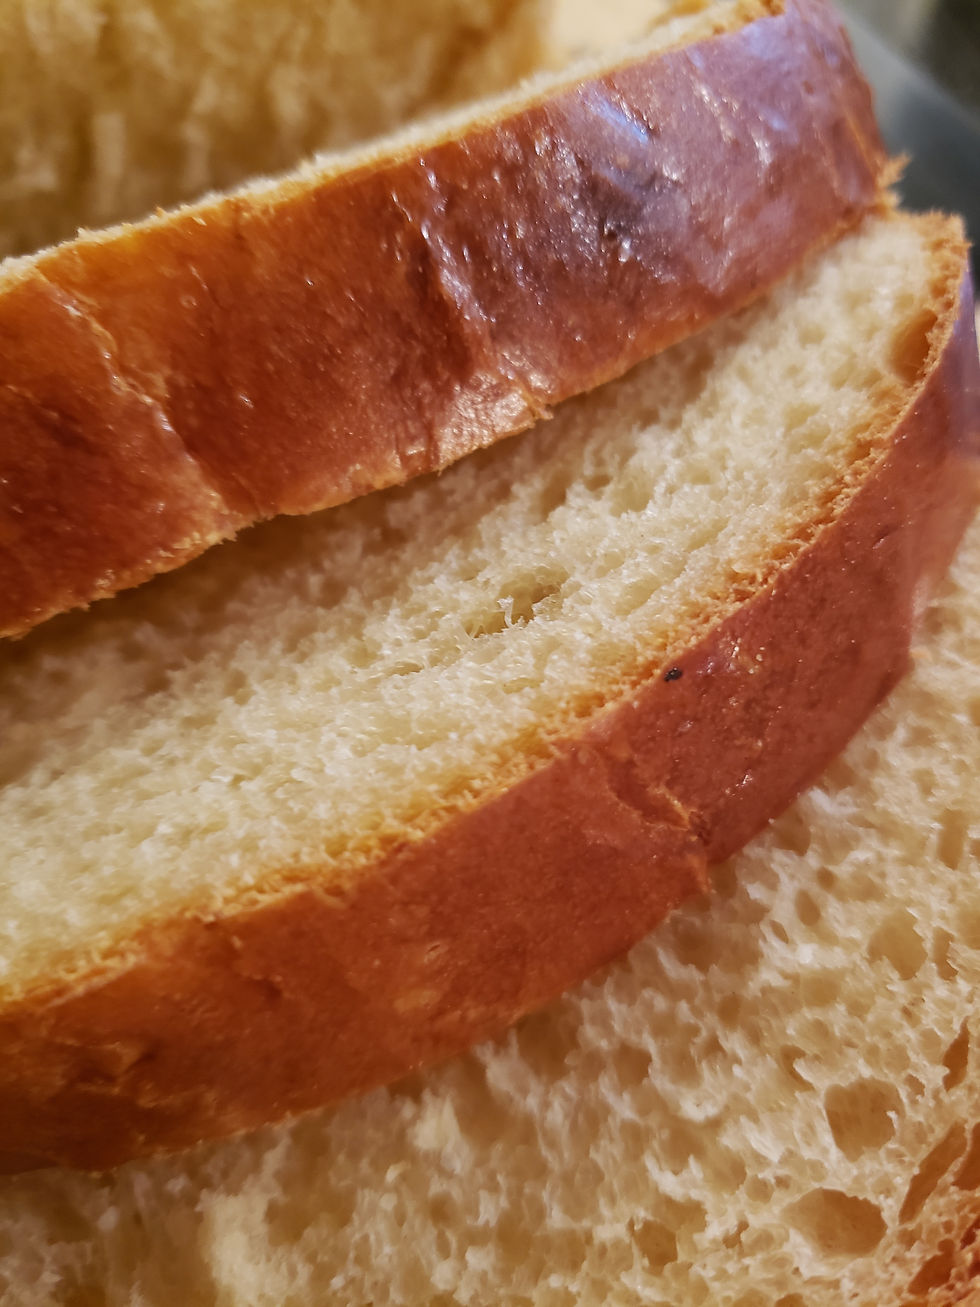
Japanese Milk Bread, also referred to as Hokkaido Milk Bread, is a lightly sweetened white bread that is exceptionally soft and fluffy. It has a slightly chewy, cloud-like texture. It's likely the lightest, fluffiest, and most tender bread you’ll encounter. Even four days after baking, this bread remains as soft and springy as it was on the first day.

Why do you want to make Japanese Milk Bread? This question opens up a world of culinary exploration and appreciation for the unique characteristics that define this beloved bread. Japanese Milk Bread, known for its soft, pillowy texture and slightly sweet flavor, has gained popularity not only in Japan but also around the globe. The desire to make this bread often stems from its remarkable qualities that set it apart from other types of bread. Firstly, the texture of Japanese Milk Bread is a significant factor that draws many to attempt making it at home.
The bread is known for its incredibly light and airy consistency, which is achieved through a special technique called the tangzhong method. This technique involves cooking a portion of the flour with water or milk to create a roux, which helps to retain moisture during the baking process. As a result, the bread stays soft and fresh for an extended period, making it an ideal choice for sandwiches, toast, or simply enjoying on its own. Moreover, the flavor profile of Japanese Milk Bread is another compelling reason for its popularity.
The subtle sweetness, combined with a rich, buttery taste, creates a delightful eating experience that complements a wide variety of toppings, from sweet jams to savory spreads. The versatility of this bread means it can be easily incorporated into breakfast, lunch, or dinner, making it a staple in many households. Additionally, the cultural significance of Japanese Milk Bread adds depth to the motivation behind making it. This bread is often associated with comfort and nostalgia, reminding many of their childhood or special moments shared with family and friends. By baking it at home, individuals can recreate those cherished memories and share them with loved ones, fostering a sense of connection and warmth.
Finally, the process of making Japanese Milk Bread can be a rewarding and enjoyable experience. It offers an opportunity to engage in the art of baking, allowing one to experiment with ingredients and techniques while honing culinary skills. The satisfaction that comes from pulling a freshly baked loaf out of the oven, with its golden crust and enticing aroma, is unparalleled. In conclusion, the desire to make Japanese Milk Bread is driven by its unique texture, delightful flavor, cultural connections, and the joy of the baking process itself. Each loaf represents not just a delicious product, but a journey filled with creativity, tradition, and personal fulfillment.
This recipe is shared from The New York Times Japanese Milk Bread recipe. Please be aware that the starter is sufficient for 2 loaves of bread, but the recipe is intended for just 1 loaf. This bread is so delicious, you'll want to double the recipe and make 2 loaves.

YIELD 1 loaf
TIME 1 1/2 hours, plus about 3 hours’ rising and cooling
Milk bread originated in Japan in the 20th century, utilizing tangzhong, a warm flour-and-water paste traditionally employed in China to create buns with a soft, springy texture and small air bubbles.
Surprisingly, milk bread with an unmatched crumb and buttery flavor is easy to make at home using ingredients from the supermarket. Once the tangzhong is prepared and cooled — taking just 10 minutes on the stove — you have a simple and highly satisfying dough. It can be shaped into coils or round rolls, like pull-aparts, instead of loaves, or you can spread it with cinnamon sugar, dulce de leche, or strawberry jam when rolling it out.
INGREDIENTS
FOR THE STARTER (tangzhong)
⅓ cup (45 grams) bread flour
½ cup (120 milliliters) whole milk
FOR THE DOUGH
2 ½ cups (325 grams) bread flour
¼ cup (60 grams) sugar
2 teaspoons (7 grams) active dry yeast (1 packet)
1 teaspoon (4 grams) salt
1 egg
½ cup (120 milliliters) warm whole milk, plus extra for brushing on the unbaked loaf
4 tablespoons/60 grams unsalted butter, cut into pieces and softened at room temperature, plus extra for buttering bowls and pan
PREPARATION
1. Make the starter: In a small heavy pot, whisk flour, milk and 1/2 cup water (120 milliliters) together until smooth. Bring to a simmer over medium-low heat and cook, stirring often, until thickened but still pourable, about 10 minutes (it will thicken more as it cools). When it’s ready, the spoon will leave tracks on the bottom of the pot. Scrape into a measuring cup and lightly cover the surface with plastic wrap. Set aside to cool to room temperature.
Important Note: You will have about 1 cup starter. The starter recipe produces enough to bake 2 loaves, because it’s difficult to cook a smaller amount. Discard the extra starter or double the dough recipe and bake 2 loaves.
2. Make the dough: In the bowl of a stand mixer fitted with a dough hook, combine the flour, sugar, yeast and salt and mix for a few seconds, just until evenly combined.
3. Add egg, milk and 1/2 cup starter. Turn the mixer on low speed and knead 5 minutes.
4. Add soft butter and knead another 10 to 12 minutes (it will take a few minutes for butter to be incorporated), until the dough is smooth and springy and just a bit tacky.
5. Lightly butter the inside of a bowl. Use your hands to lift dough out of mixer bowl, shape into a ball and place in prepared bowl. Cover with a kitchen towel and let rise in a warm place until doubled in size, 40 to 60 minutes.
6. Punch the dough down and use your hands to scoop it out onto a surface. Using a bench scraper or a large knife, cut dough in half. Lightly form each half into a ball, cover again and let rise 15 minutes.
7. Heat the oven to 350 degrees. In the meantime, generously butter a 9-by-5-inch loaf pan.
8. Using a rolling pin, gently roll out one dough ball into a thick oval. (By this time, the dough should be moist and no longer sticky. You probably will not need to flour the surface, but you may want to flour the pin.) First roll away from your body, then pull in, until the oval is about 12 inches long and 6 inches across.
9. Fold the top 3 inches of the oval down, then fold the bottom 3 inches of the oval up, making a rough square. Starting from the right edge of the square, roll up the dough into a fat log, pick it up and smooth the top with your hands. Place the log in the buttered pan, seam side down and crosswise, nestling it near one end of the pan. Repeat with the other dough ball, placing it near the other end of the pan.
10. Cover and let rest 30 to 40 minutes more, until the risen dough is peeking over the edge of the pan and the dough logs are meeting in the center. Brush the tops with milk and bake on the bottom shelf of the oven until golden brown and puffed, 35 to 40 minutes.
11. Let cool in the pan 10 minutes, then remove to a wire rack and let cool at least 1 hour, to let the crust soften and keep the crumb lofty. (If cut too soon, the air bubbles trapped in the bread will deflate.)


Comments